Repotting in 9 Easy Steps
Keeping a houseplant or any container plant healthy requires moving the plant to larger accommodations before the roots get too crowded.
If you’re new to container gardening, there’s no reason for worry; repotting is probably a lot easier than you think.
When Does My Plant Need Repotting?
Don’t repot unless the plant needs it because unnecessary repotting stresses the roots for no good reason. Some plants can go a long time without repotting and may be happiest when the roots are a little crowded. If you aren’t sure it’s time, watch for the following signs:
- Water runs through the pot without absorbing into the soil.
- The plant looks pale and unhealthy.
- Roots are growing through the drainage hole.
- The plant has grown so tall that it tips over easily.
- The roots are in a tight mass with very little potting soil remaining (Slide the plant carefully from the pot to take a look.).
What Supplies Do I Need?
It’s a good idea to gather your materials ahead of time. Here’s what you need:
- An old sheet, a layer of newspapers or a vinyl tablecloth to protect your working surface and simplify cleanup.
- A clean pot with a drainage hole. The pot should be no more than one or two sizes larger than the current pot.
- Potting mix. Most plants do well in a good quality, soilless mix, but some may need something a little more specialized; for example, potting mix formulated specifically for orchids, African violets or cactus.
- Sharp, sterile knife and/or scissors.
- Mycorrhizae: add this natural growth supplement when transplanting. It helps develop the root system through a more efficient uptake of water and nutrients by the plant.
Here are the 9 Steps to follow:
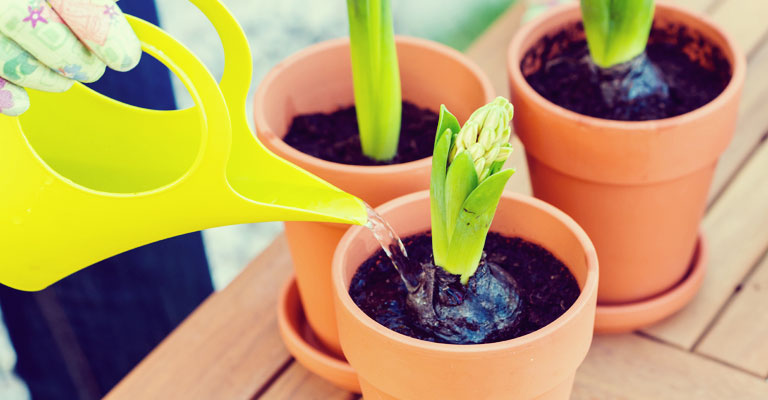
- Water the plant a day or two before repotting.
- Place a coffee filter or a small piece of mesh over the drainage hole to prevent potting mix from escaping. Don’t place gravel or pot shards in the bottom of the pot.
- Fill the new pot about one-third full with fresh potting soil. When the job is done, the top of the rootball should be an inch or less below the rim of the new container.
- When removing the plant from its old pot, place your hand on the surface of the soil with the stem between your thumb and forefinger. Place the pot on its side and stabilize it with your other hand as you slide the plant carefully from the pot.
- Look closely at the roots. If they are compacted, use your fingers to gently tease them loose. Use a sharp, sterile knife or scissors to loosen the roots if the plant is severely rootbound.
- Position the plant carefully in the new pot. If necessary, lift the plant and add or remove a little potting soil to bring the top of the root ball to the correct level.
- Fill in around the rootball with potting mix, and pat gently your fingers, but don’t pack it tightly.
- Place the plant in the sink. Water well and let the pot drain thoroughly. Add a little more potting mix if the plant settles.
- Place the plant in indirect light for a few days to give it a chance to settle in and withhold fertilizer for about a month.